| 35.5. DNS Blacklist (Web filter) | ||
|---|---|---|
 | Chapter 35. DNS - Domain Name System |  |
| 35.5. DNS Blacklist (Web filter) | ||
|---|---|---|
| | Chapter 35. DNS - Domain Name System | |
The DNS Blacklist blocks the resolving of some defined domains.
To enable the DNS blacklist the DNS
Relay must be enabled, and the RELAY-BLACKLIST
parameter must be set to yes.
[10:51:02] ABILIS_CPX:s p dns relay:yesCOMMAND EXECUTED [10:52:17] ABILIS_CPX:s p dns relay-blacklist:yesCOMMAND EXECUTED [10:52:33] ABILIS_CPX:d p dnsRES:Dns - Not Saved (SAVE CONF), Not Refreshed (INIT) ------------------------- Run DESCR:Domain_Name_System LOG:NO ACT:YES udp-locport:53 SRCADD:OUT-IP TOS:0-N wdir:C:\APP\DNS\ - Resolver ------------------------------------------------------------- SERVERS:AUTO PRIMARY:008.008.008.008 SECONDARY:008.008.004.004 DELAY:5 RTY:1 CACHE:YES cache-size:500 - Relay/Server --------------------------------------------------------- RELAY:YES relay-size:500 RELAY-TOUT:10 RELAY-WHITELIST:YES RELAY-WHITELIST-CLIENTS:# RELAY-BLACKLIST:YES RELAY-BLACKLIST-BYPASS:# RELAY-LOG-REQUESTERS: SERVER:NO IPSRC:* IPSRCLIST:#
![[Caution]](../images/caution.png) | Caution |
|---|---|
To activate the changes made on the upper case parameters, execute the initialization command init res:dns; while to set act the changes made on the lowercase parameters a save conf and an Abilis restart are required (i.e. With warm start command). |
![[Note]](../images/note.png) | Note |
|---|---|
Check if PCs are configured with the right DNS server. The DNS server must be only one and only the local gateway. For the PCs that have dynamically assigned IP address check the DHCP server configuration on the Abilis. [11:42:38] ABILIS_CPX: |
| Note | ||
|---|---|---|---|
If someone intentionally changes the DNS server to access a page that is blocked, then it needs to configure the access list to block external DNS requests. Use the following commands to add new filters to the IP access list: [12:01:22] ABILIS_CPX:
|
| Note |
|---|---|
After you have banned a domain to apply immediately blocking is necessary to flush a computer's DNS cache. |
The following command shows the list of the resolved domains:
[10:55:50] ABILIS_CPX:d dns blacklist resolved

Resolved domains (9/2000):

FQDN
-------------------------------------------------------------------------------
- fhr.data.mozilla.com
- dns.msftncsi.com
- gtssl-ocsp.geotrust.com
- example.com
- www.iana.org
- antek.it
- www.aylook.com
- www.antek.it
- www.elettrorapido.com
-------------------------------------------------------------------------------
To add a domain to the list of banned domains, use the following command:
[10:56:08] ABILIS_CPX:a dns blacklist banned dn:example.comCOMMAND EXECUTED [10:56:34] ABILIS_CPX:d dns blacklist bannedBanned domains (1/2000): DN ------------------------------------------------------------------------------- - example.com -------------------------------------------------------------------------------
To remove a domain from the list of banned domains use the following command
[10:56:48] ABILIS_CPX:c dns blacklist banned dn:example.com
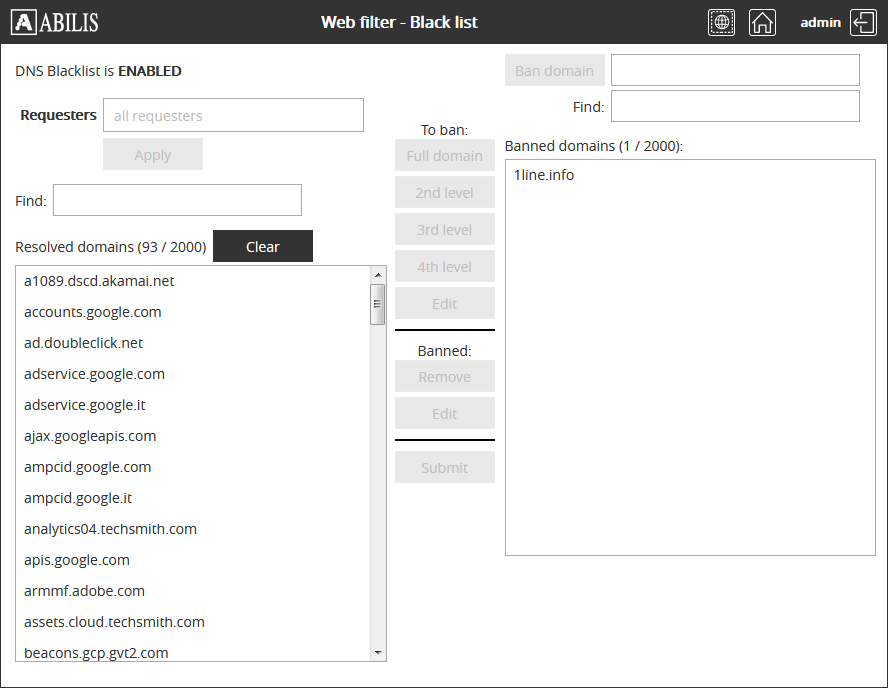
COMMAND EXECUTEDTo manage the DNS Blacklist using the web interface go on the Abilis homepage, login and click on Web filter.
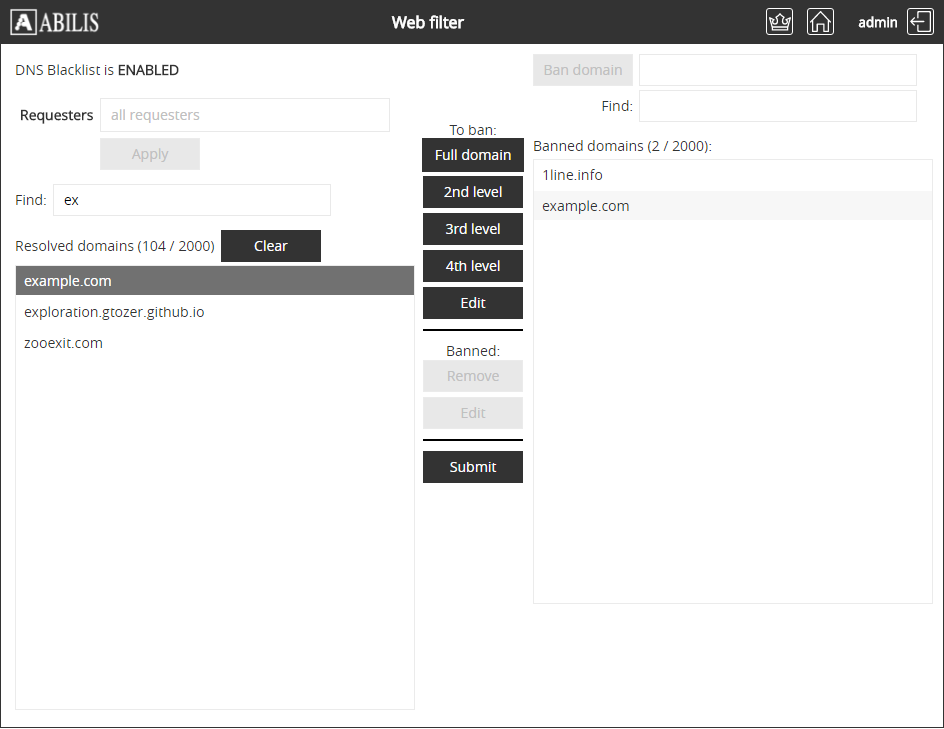
There are 2 ways to put a domain in the banned domains list:
Select the domain from the 'Resolved domains' list and click on 'Full domain', '2nd level', '3rd level' or '4th level'.
Insert the domain in the textbox near to the 'Ban domain' button and click Ban domain.
Click on Submit to save and apply the changes.
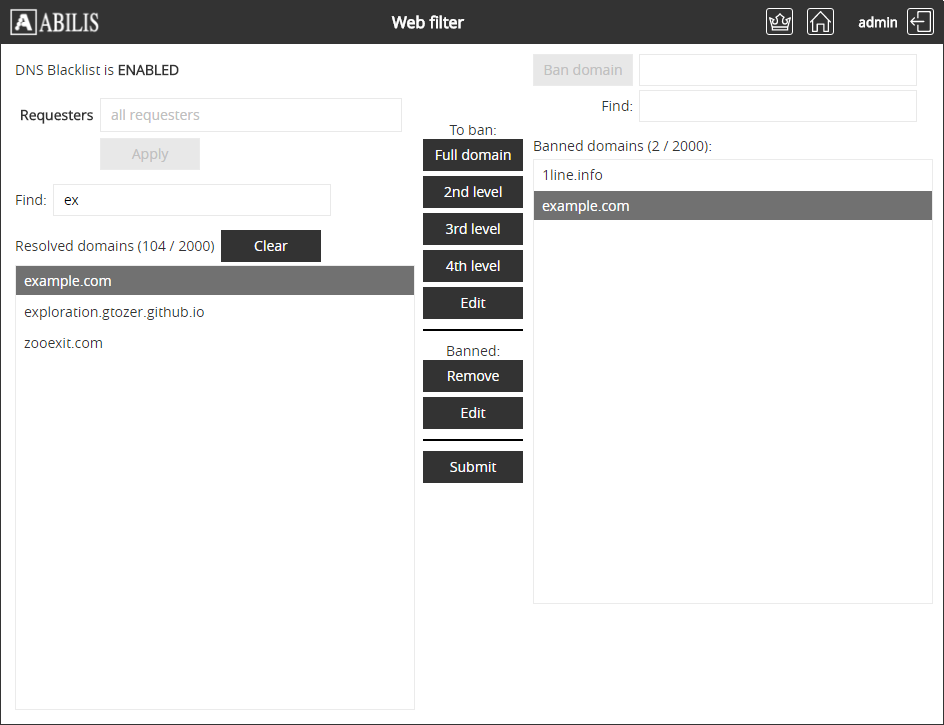
To remove a domain from the Banned list, select it and click on Remove. Click on Submit to save and apply the changes.
| |  | |
| 35.4. DNS Server |  | 35.6. DNS diagnostics, statistics and debug |