| 90.1. Shrew Soft IPsec VPN client | ||
|---|---|---|
 | Chapter 90. IPsec clients |  |
Go to https://www.shrew.net/ and download Shrew Soft IPsec VPN client (release 2.2.2) from DOWNLOAD > VPN Client For Windows section.
Double-click the downloaded file and install the program following the instructions (Standard Edition).
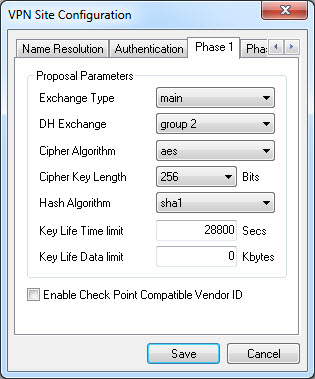
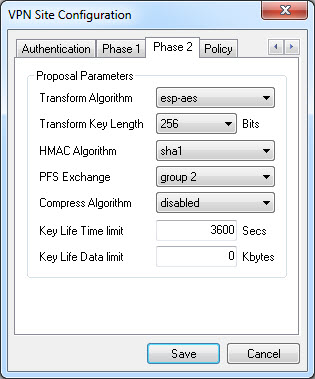
This table show the parameters of Shrew Soft and their corresponding parameters in Abilis configuration. The information must be inserted in a “mirror” way: i.e. “LOCAL” information for Abilis are “REMOTE” for IPsec client and vice versa.
Table 90.1. Checklist of parameters
| The Shrew Soft parameter | Abilis IKE Table | Abilis IKE Table parameter |
|---|---|---|
| Remote Host | HOST | LOC-IP |
| Authetication metod | HOST | AUTH |
| Pre Shared Key | PSK | KEY |
| Cipher Algorithm | HOST | CIPHER |
| Hash Algorithm | HOST | HASH |
| DH Excange | HOST | DH |
| Auto Configuration | HOST | MODE-CFG |
| Remote Identification Type | HOST | ID-TYPE |
| Remote Address String | HOST | IP or FQDN |
| Local Identification Type | HOST | PEER-ID-TYPE |
| Local Address String | HOST | PEER-IP or
PEER-FQDN |
| Local Host | CLI | NET-REM |
| Transform Algorithm | CLI | ESP-CIPHER |
| HMAC Algorithm | CLI | ESP-AUTH |
| PFS Excange | CLI | PFS |
| Remote Network Resource | CLI | NET-LOC |
Suppose that Abilis is configured in the following way. Refer to Section 83.19.1, “How to configure a RAS using IPSEC VPN server” for the configuration of IPsec and IKE resources.
[22:54:53] ABILIS_CPX:d ike host:0------------------------------------------------------------------------------- HOST: NAME: LIFETIME: HASH: DPD: DPD-ACTION: LOCIP: NATT: MODE: MODE-CFG: DH: DPD-DELAY: REMIP: SIDE: AUTH: XAUTH: CIPHER: SA-TRY: DPD-TOUT: XAUTH-USER: XAUTH-PWD: -- PSK ID --------------------------------------------------------------- ID-TYPE: IP:/ID: PEER-ID-TYPE: PEER-IP:/PEER-ID: -- RSA Cert ------------------------------------------------------------- CERT-SEND: ASN1-DN: CERT-PEER: PEER-ASN1-DN: CERT-VERIFY: ------------------------------------------------------------------------------- 0 Agent_HOST1 28800 SHA1 YES STOP 080.080.080.080 SYS MAIN NO MODP1024 30 * INSIDE PSK NO AES256 3 120 -- PSK ID --------------------------------------------------------------- IP 080.080.080.080 IP 192.168.200.001 ------------------------------------------------------------------------------- [22:54:53] ABILIS_CPX:d ike psk:0------------------------------------------------------------------------------- PSK: KEY: PEER-ID-TYPE: PEER-IP:/PEER-ID: ------------------------------------------------------------------------------- 0 ******** ANONYMOUS [22:54:53] ABILIS_CPX:d ike cli:0------------------------------------------------------------------------------- CLI: NAME: LIFETIME: ESP: AH: HOST: NET-LOC: RULE: PASSIVE: PFS: ESP-AUTH: AH-AUTH: NET-REM: PERMANENT: TUNNEL: ESP-CIPHER: MODE-CFG-DNS: ------------------------------------------------------------------------------- 0 Agent_Cli1 3600 YES NO 0 192.168.001.000/24 IPSEC YES YES SHA1 SHA1 192.168.200.001/32 YES YES AES256 SYS -------------------------------------------------------------------------------
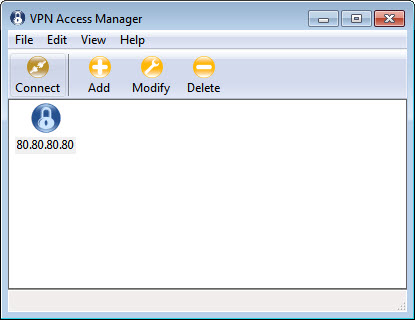
Execute Shrew Soft program (VPN Access Manager): the following window will appear.
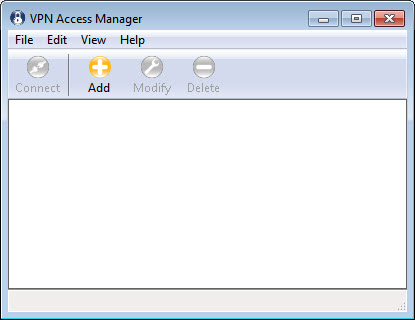
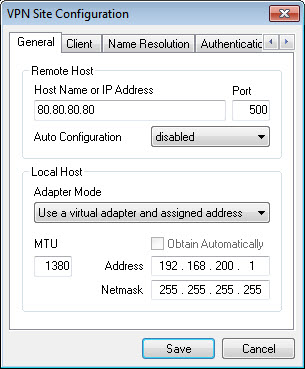
Click the Add button to create a new VPN connection. Configure General tab as shown here below.
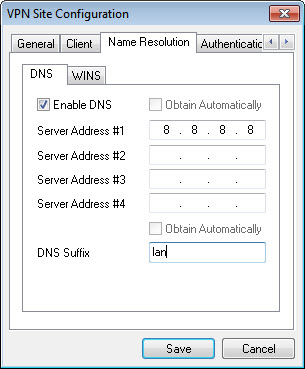
Click the Name Resolution tab and configure the DNS as shown here below.
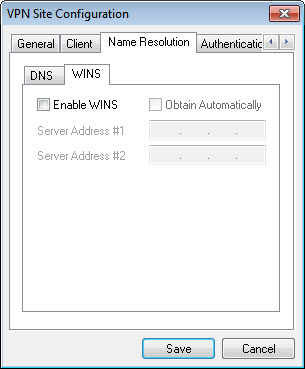
Click the WINS subtab and disable WINS.
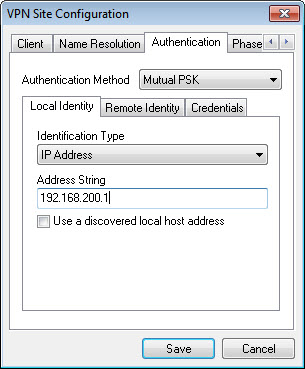
Click the Authentication tab and configure as shown here below.
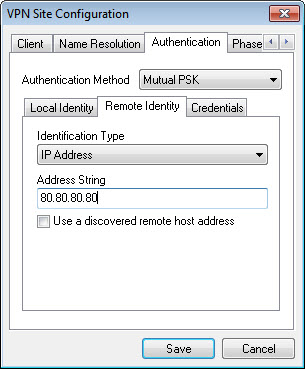
Click the Remote Identity subtab and configure as shown here below.
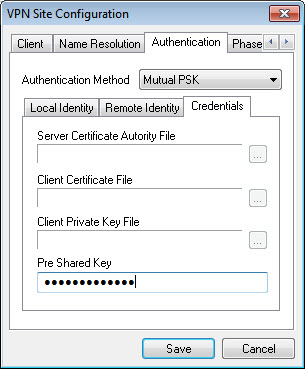
Click the Credentials subtab and configure as shown here below.
Click the Phase 1 tab and configure as shown here below.
Click the Phase 2 tab and configure as shown here below.
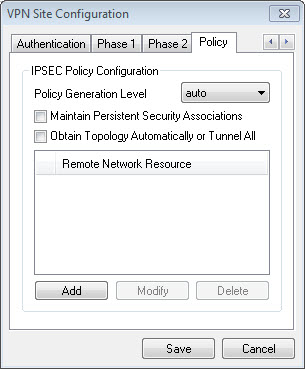
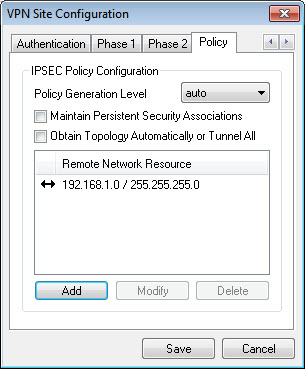
Click the Policy tab and click the Add button.
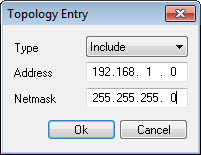
Insert the Remote Network and click Ok.
The Shrew Soft VPN IPsec client is now configured. Click the Save button to save the configuration.
Select the VPN connection recently configured and click the Connect button.
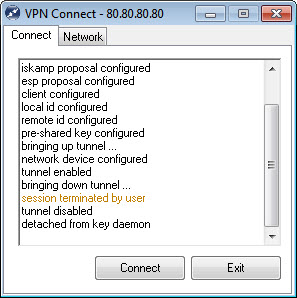
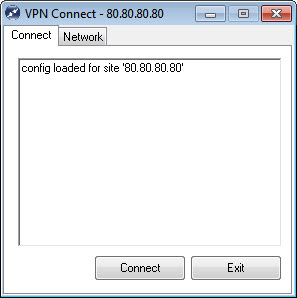
The following window will appear. Click the Connect button to open the VPN connection.
If will appear the message "tunnel enabled", then VPN connection is active
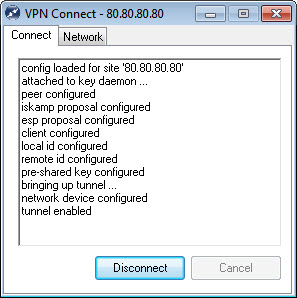
Click the Disconect button to close the VPN connection. Click Exit button to close the window.
