| 90.11. During the call | ||
|---|---|---|
 | Chapter 90. Abilisphone - End user manual |  |
| 90.11. During the call | ||
|---|---|---|
| | Chapter 90. Abilisphone - End user manual | |
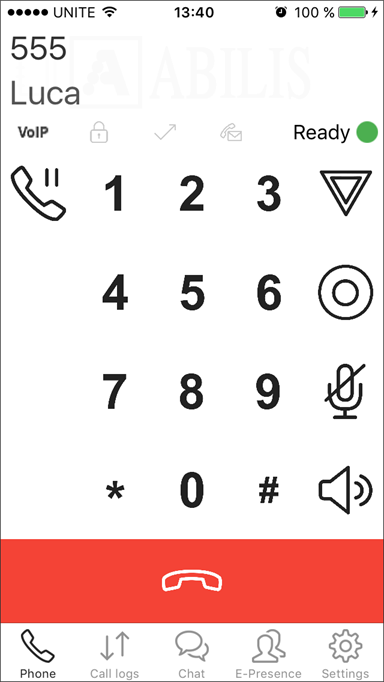
During a VoIP call the user interface offer this page:
On the upper side there is:
The counterpart number;
The counterpart user, if the name is registered in the ABILIS address-book.
Moreover the following features are offered:
 -
Muting the microphone.
-
Muting the microphone.
Sending DTMFs via phone keypad.
 -
Activate the speaker.
-
Activate the speaker.
![]() -
This button puts the party on hold and lets the user to call and talk
with a second party. Pressing this button again recovers the first
call from hold and puts the second one on-hold. Terminating the call
-instead- connects the first with the second party.
-
This button puts the party on hold and lets the user to call and talk
with a second party. Pressing this button again recovers the first
call from hold and puts the second one on-hold. Terminating the call
-instead- connects the first with the second party.
![]() -
This button starts the recording. While you are recording the button
blinks
-
This button starts the recording. While you are recording the button
blinks ![]() . To stop the
recording, click again on the button.
. To stop the
recording, click again on the button.
![]() - Sets the
'precedence' option on. Precedence is an option for users registered
in the same Abilis. Precedence alerts users even if they're busy in
another conversation, or even if they had set the Do-not-Disturb
flag.
- Sets the
'precedence' option on. Precedence is an option for users registered
in the same Abilis. Precedence alerts users even if they're busy in
another conversation, or even if they had set the Do-not-Disturb
flag.
![[Tip]](../images/tip.png) | Tip |
|---|---|
Interesting chapter: Section 73.4.1.1, “Setting priorities for precedence call”. |
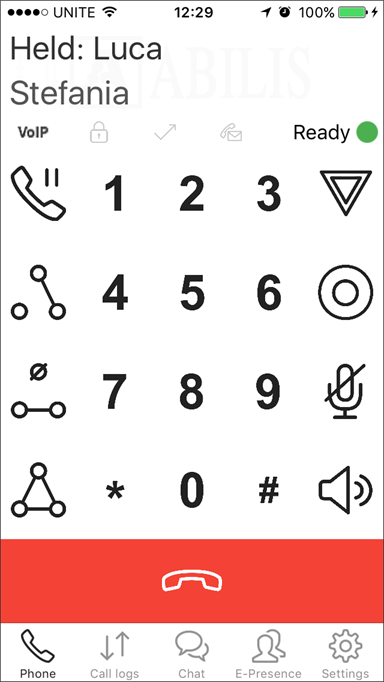
Closing the call
To place the second call, you may use a mini dialer (keyboard button) or the address book button (you have to pause the first call before doing it.
During the second call, you may:
 - Switch
between the two calls.
- Switch
between the two calls.
![]() - Transfer the two
calls, connect the first party with the second party.
- Transfer the two
calls, connect the first party with the second party.
![]() - Create a conference between
you.
- Create a conference between
you.
![[Note]](../images/note.png) | Note |
|---|---|
Interesting chapter: Chapter 77, OPC panel - End user manual. |
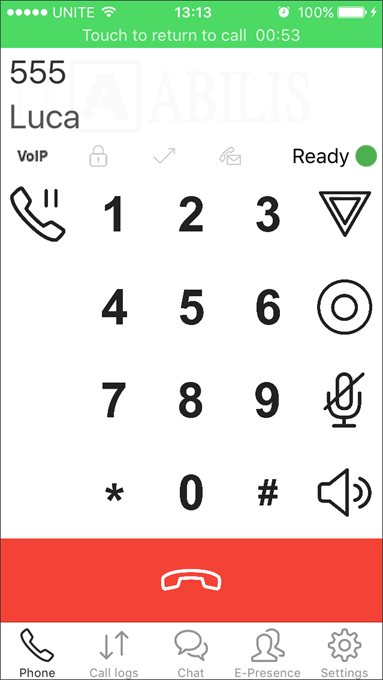
In case of GSM calls ordered by phone the application is normally in the background. If the application is opened the following page is shown.
The following features are offered:
-
Muting the microphone.
-
Activate the speaker.
![]() -
This button puts the party on hold and lets the user to call and talk
with a second party. Pressing this button again recovers the first
call from hold and puts the second one on-hold. Terminating the call
-instead- connects the first with the second party.
-
This button puts the party on hold and lets the user to call and talk
with a second party. Pressing this button again recovers the first
call from hold and puts the second one on-hold. Terminating the call
-instead- connects the first with the second party.
![]() -
This button starts the recording. While you are recording the button
blinks
-
This button starts the recording. While you are recording the button
blinks ![]() . To stop the
recording, click again on the button.
. To stop the
recording, click again on the button.
Closing the GSM call.
If the call uses a UMTS-BOX to interface with Abilis then also second call, DTMFs, SWITCH and TRANSFER features are available.
![[Warning]](../images/warning.png) | Warning |
|---|---|
If UMTS-BOX is not used, some buttons appear still available, but cannot work, as its feature needs UMTS-BOX to work. |
| Warning |
|---|---|
Be careful, Abilis commands do not interact directly with the phone, but just with Abilis. In case of missing or bad data connection the command cannot reach Abilis so i.e. the close GSM call button may fail and the user must close the call manually if it is not closed automatically. |
| |  | |
| 90.10. Incoming call |  | Chapter 91. IPsec clients |