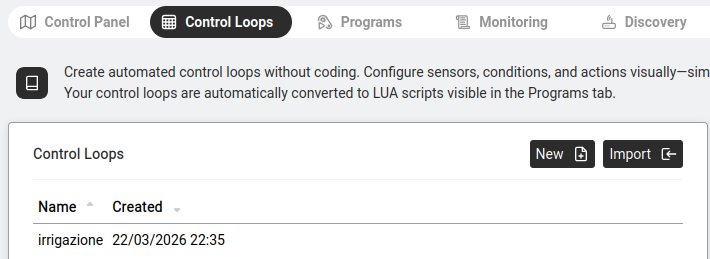
Control Loops let you build automation rules visually instead of writing code — sensors and conditions go in a spreadsheet-style editor, and the Abilis turns the formulas into a Lua program for you. Similar in spirit to how a PLC is programmed, but with no dedicated programming-cable hardware needed.
When you create a new control loop (New +), the editor shows two main tables:
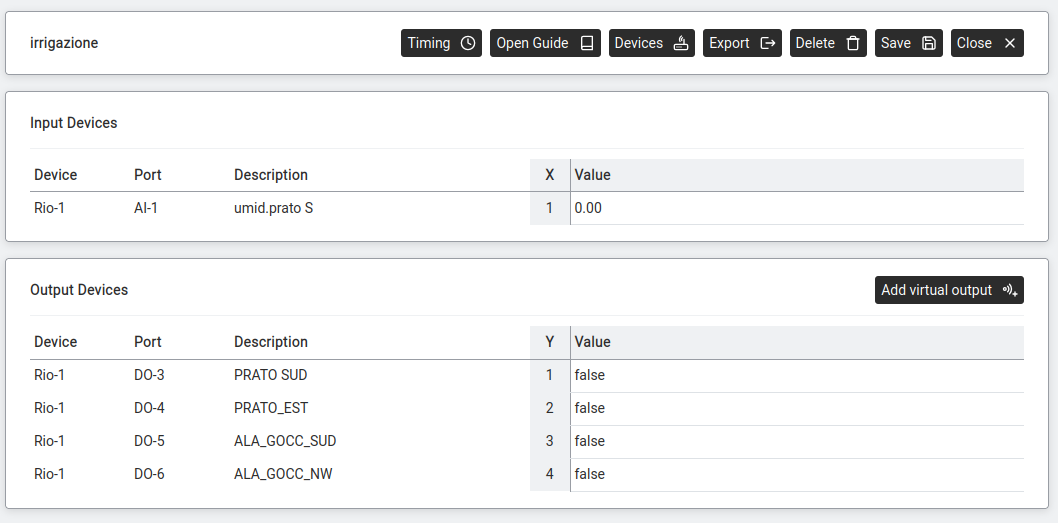
The top table lists sensors — devices the loop reads from.
| Column | Meaning |
|---|---|
| Device | The physical device name (e.g. RIO-1, Sonoff-3). |
| Port | Which specific port/channel on the device. |
| Description | A human-readable label (e.g. "Office temperature sensor"). |
| X | The variable name used in formulas. The first input is X1, the second X2, etc. (Despite the letter, this isn't a spatial coordinate — it's just a short name to reference the sensor in your formula.) |
| Value | The current value being read from this sensor. |
The bottom table lists actuators — devices the loop controls.
| Column | Meaning |
|---|---|
| Device | The physical device name. |
| Port | Which port/channel. |
| Description | Human-readable label. |
| Y | The variable name for this output: Y1 for the first output, Y2 for the second, etc. (Same convention as the X inputs — not a spatial coordinate.) |
| Value | This is where you write the formula. The formula references input coordinates (X1, X2...) and produces the output. For example: IF(X1>25, 1, 0) turns the output ON when the temperature (X1) exceeds 25°C. |
Click Add virtual output to add more output rows. A virtual output isn't wired to a physical actuator — use it for intermediate calculations whose result feeds another formula, or for state values you want to log without driving anything.
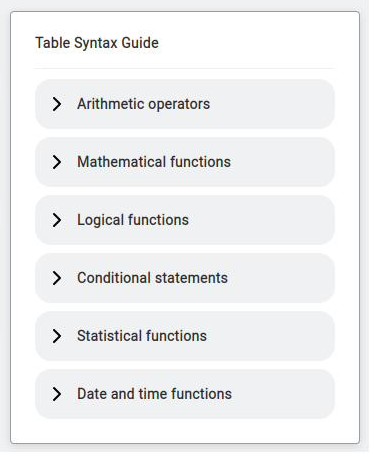
On the right side of the editor, an expandable Table Syntax Guide provides reference for writing formulas. Sections include:
| Button | What It Does |
|---|---|
| Timing | Set how often the loop executes (e.g. every 1 second, every 5 seconds, every minute). |
| Open Guide / Close Guide | Toggle the Syntax Guide panel on the right. The button label changes depending on the current state. |
| Devices | Add input sensors and output actuators to the tables. |
| Export | Export the loop's configuration to a file (so it can be imported on another Abilis or kept as a backup). |
| Delete | Delete this control loop entirely. |
| Save | Save the control loop. It is automatically converted to a Lua script that appears in the Programs tab. |
| Close | Exit the editor. |
The following functions and operators are available in Control Loop formulas (sourced from the official Abilis tutorial):
Standard arithmetic: + (addition), - (subtraction),
* (multiplication), / (division), ( ) (brackets for grouping).
| Function | What It Does |
|---|---|
ABS(value) | Returns the number with a positive sign (absolute value). |
EVEN(value) | Returns 1 if the number is even, 0 if odd. |
ODD(value) | Returns 1 if the number is odd, 0 if even. |
INT(value) | Returns the integer part, removing decimals. |
ROUND(value, decimals) | Rounds the number to the specified decimal places. |
LOG10(value) | Returns the base-10 logarithm. |
MOD(value) | Returns the decimal part, removing the integer (e.g. MOD(3.14) = 0.14). Note: this is single-argument and Abilis-specific — it is not the modulo / remainder operation, which is what MOD(x, y) means in most spreadsheets. For modulo on Abilis, use the % operator (e.g. 7%3 = 1). |
RAND() | Returns a random decimal between 0 and 1. |
RANDBETWEEN(from, to) | Returns a random integer between the two values. |
POW(value, exponent) | Raises the number to the exponent. Use decimals for roots (e.g. POW(X1, 0.5) = square root). |
SQRT(value) | Returns the square root. |
| Function | What It Does |
|---|---|
NOT(value) | Returns true if input is false, and vice versa. |
AND(v1, v2 [, v3...]) | Returns true only if all inputs are true. Up to 10 values. |
OR(v1, v2 [, v3...]) | Returns true if any input is true. Up to 10 values. |
XOR(v1, v2) | Returns true if exactly one input is true and the other is false. |
IF(condition, value_if_true, value_if_false)
Example: IF(X1>25, 1, 0) → output 1 when temperature exceeds 25°, otherwise 0.
You can reference a device's previous value by adding a time offset in brackets:
X1(time_to_past). The time unit is determined by the interval set in the
Timing section of the loop. For example, if timing is set to 5 seconds,
X1(3) means "the value of X1 from 15 seconds ago" (3 × 5s).
X1(3) looks like a function call, it's actually array-indexing
for historical values. The Abilis stores the last few readings of each input, and
X1(3) retrieves the value from 3 timing-cycles ago.
In addition to inputs (X) and outputs (Y), Control Loops can also
use memory variables (M1, M2, …) to keep state between
cycles — useful for counters, running totals or anything where the next cycle needs
to know what happened in the previous one. See
Equipment run-time tracking for a worked
example.
Functions can be chained by nesting one inside another. For example, to get the average of the square root of two sensor inputs:
AVERAGE(POW(X1, 0.5), POW(X2, 0.5))