| 63.16. DISA | ||
|---|---|---|
 | Chapter 63. Administration |  |
| 63.16. DISA | ||
|---|---|---|
| | Chapter 63. Administration | |
This section allows to add/remove/change services and users, to display diagnostics and to manage messages sets.
![[Caution]](../images/caution.png) | Caution |
|---|---|
Generally the access to this section is reserved to users with administrator's rights. |
By default, the anonymous access is disabled; add the path in the
HTTP Virtual Paths Access Rights Table for
httpuser.
[10:49:09] ABILIS_CPX:a http rights path:/sys/admin/disa/ user:httpuserCOMMAND EXECUTED [10:49:14] ABILIS_CPX:d http rights- Not Saved (SAVE CONF) ------------------------------------------------------- ------------------------------------------------------------------------------- ID: PATH: USER: FILE: DIR: RECUR: PROT: ------------------------------------------------------------------------------- 1 /sys/ admin r--- l--- YES PLAIN,SSL ------------------------------------------------------------------------------- 9 /sys/admin/ httpuser r--- l--- NO PLAIN,SSL ------------------------------------------------------------------------------- 11 /sys/admin/disa/ httpuser r--- l--- YES PLAIN,SSL ------------------------------------------------------------------------------- 6 /sys/admin/lists/ httpuser r--- l--- YES PLAIN,SSL ------------------------------------------------------------------------------- 10 /sys/admin/users/ httpuser r--- l--- YES PLAIN,SSL ------------------------------------------------------------------------------- 5 /sys/advuser/ httpuser r--- l--- YES PLAIN,SSL ------------------------------------------------------------------------------- 4 /sys/disa/ disa r--- l--- YES PLAIN,SSL ------------------------------------------------------------------------------- 3 /sys/opc/ test r--- l--- YES PLAIN,SSL ------------------------------------------------------------------------------- 2 /sys/pub/ anonymous r--- ---- YES PLAIN,SSL ------------------------------------------------------------------------------- 8 /sys/sms/ httpuser r--- l--- YES PLAIN,SSL ------------------------------------------------------------------------------- 7 /sys/trfa/ httpuser r--- l--- YES PLAIN,SSL -------------------------------------------------------------------------------
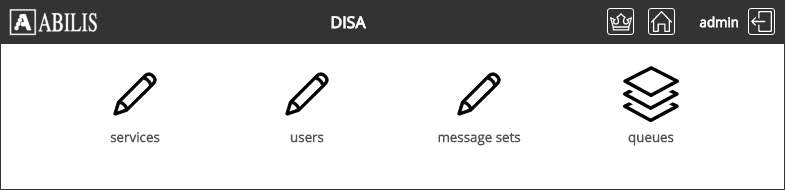
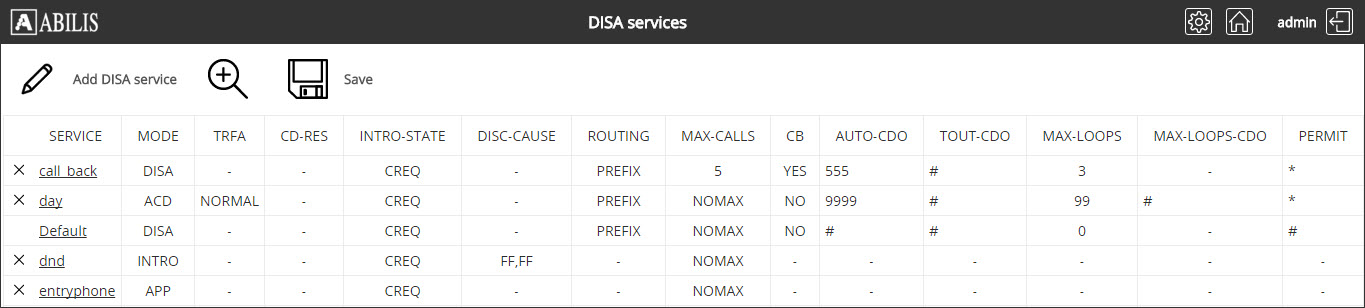
Click Login on the CPX home page and insert login and password. Go to Administration and select the DISA link to access to the following page.
![[Tip]](../images/tip.png) | Tip |
|---|---|
Interesting part: Chapter 53, DISA - Direct Inward System Access. |
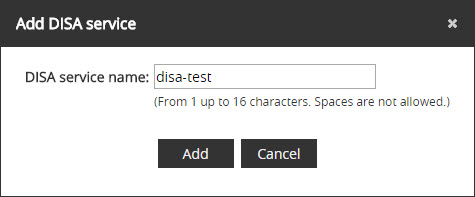
Click on ![]() button (Add DISA
service), insert the DISA service name (e.g. disa-test) and click
Add button.
button (Add DISA
service), insert the DISA service name (e.g. disa-test) and click
Add button.
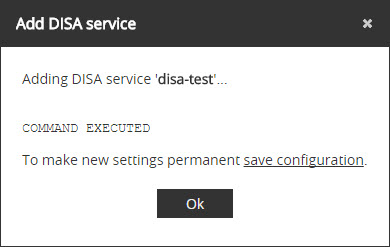
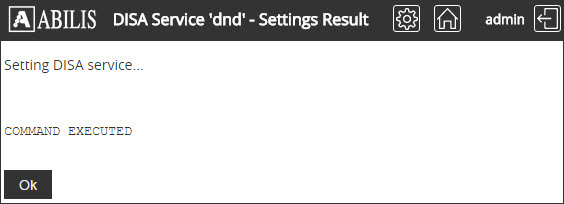
The following page confirms the change. Click Ok button.
| Tip |
|---|---|
Remember to save the configuration to make the change permanent. |
| Tip |
|---|---|
Interesting part: Section 53.3.1, “CTIDISA Service table”. |
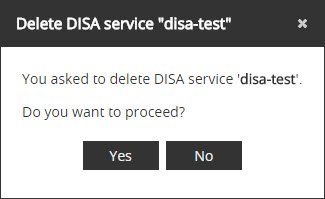
Click  to remove a service.
Click YES button to confirm.
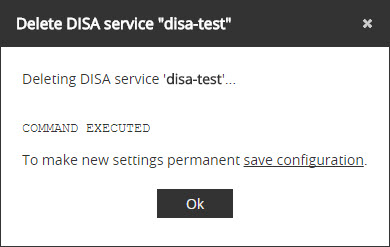
This is the confirmation page:
| Tip |
|---|---|
Remember to save the configuration to make the change permanent. |
| Tip |
|---|---|
Interesting part: Section 53.3.1, “CTIDISA Service table”. |
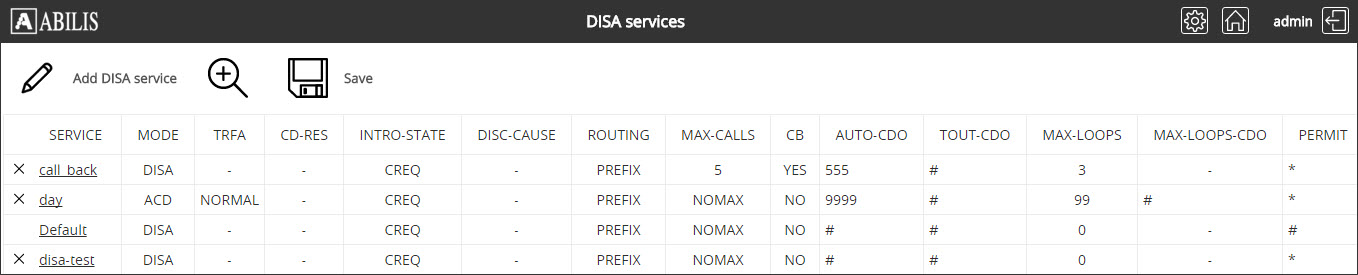
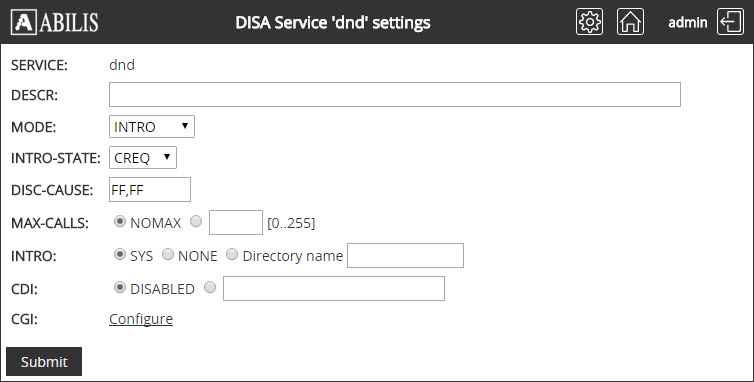
Click the service to change.
Set new parameters and click Submit button.
Click Ok button on confirmation page.
Click Back button on the following page.
| Tip |
|---|---|
Interesting part: Section 53.3.1, “CTIDISA Service table”. |
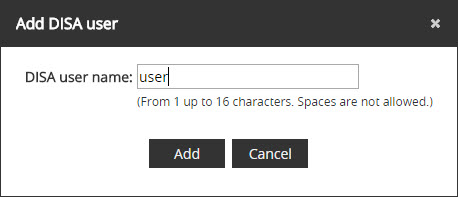
Click on ![]() button (Add DISA
user), Insert the user name
and click Add button to add a new
user.
button (Add DISA
user), Insert the user name
and click Add button to add a new
user.
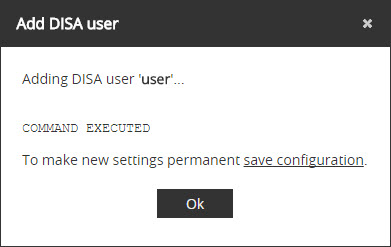
Click Ok on the confirmation page.
| Tip |
|---|---|
Remember to save the configuration. |
| Tip |
|---|---|
Interesting part: Section 53.3.2, “CTIDISA User table”. |
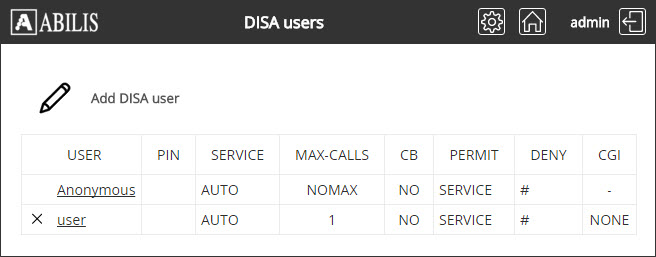
Click on the DISA
administration page to remove a user.
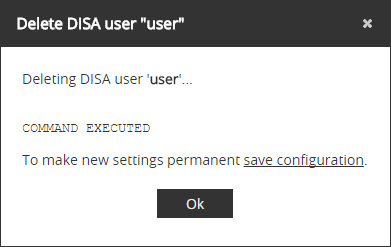
Click Yes button to confirm the deletion.
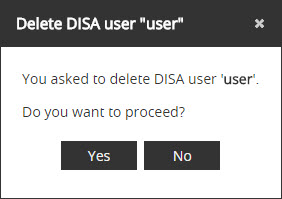
Click Ok on the confirmation page.
| Tip |
|---|---|
Remember to save the configuration. |
| Tip |
|---|---|
Interesting part: Section 53.3.2, “CTIDISA User table”. |
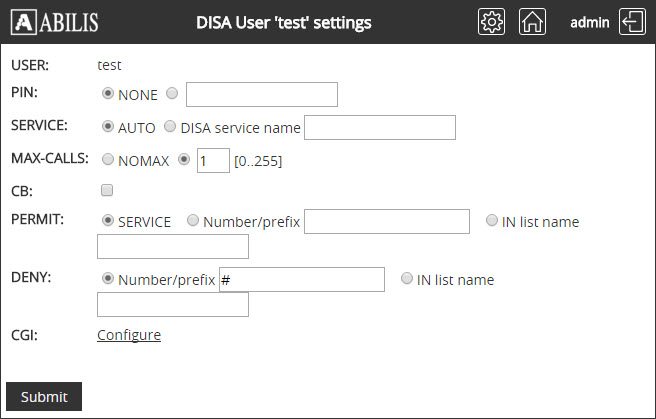
Click the user to change.
Set parameters as needed and click Submit button.
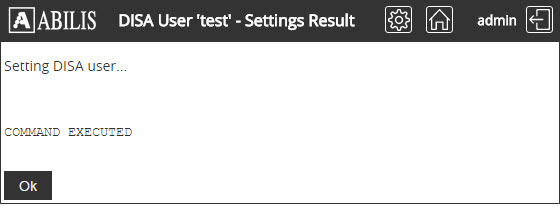
Click Ok button on the confirmation page.
| Tip |
|---|---|
Remember to save the configuration. |
| Tip |
|---|---|
Interesting part: Section 53.3.2, “CTIDISA User table”. |
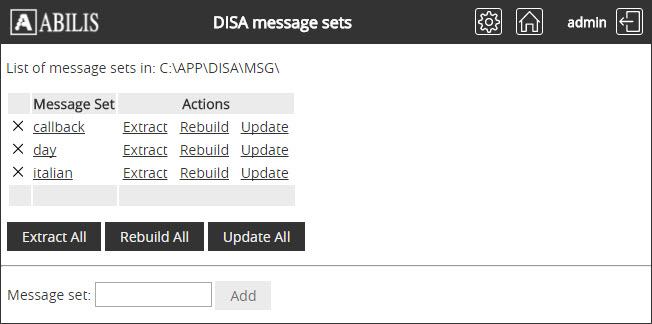
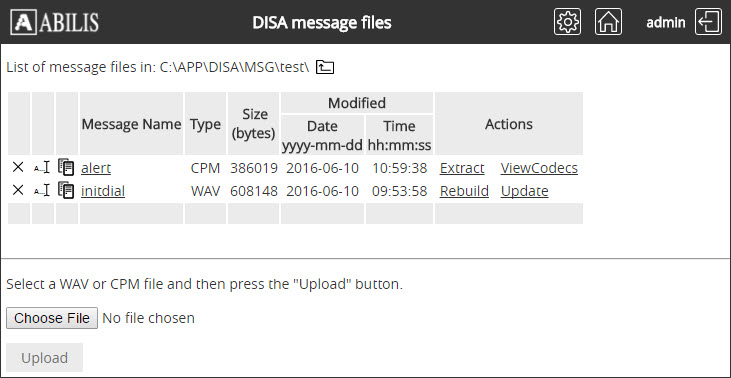
This page allows to Extract/Rebuild/Update messages sets used by CTIDISA resource.
Click "DISA message sets" to view the list of existing messages sets.
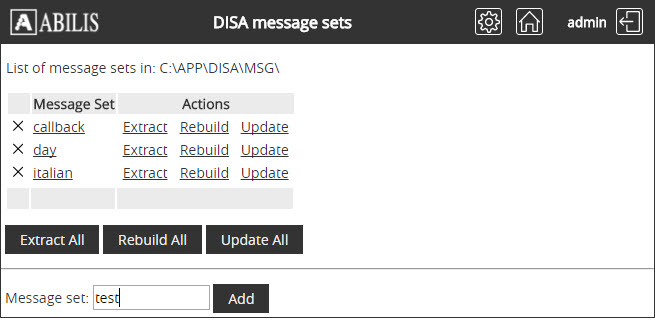
To add new name of the message group insert the message set name in the textbox and click the Add button.
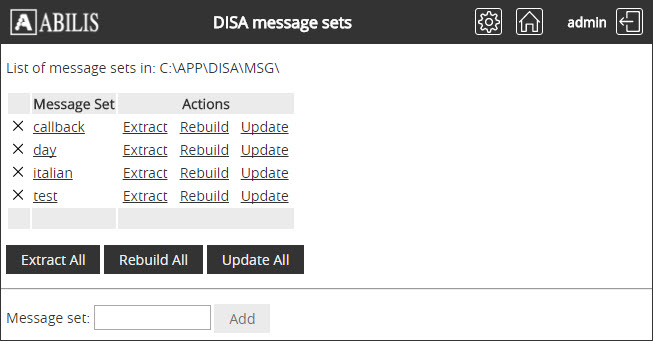
The new message set was added.
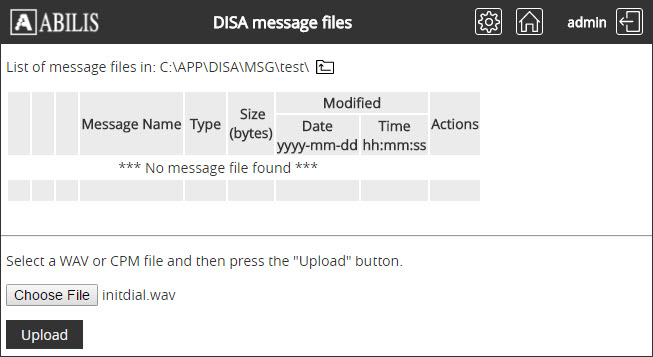
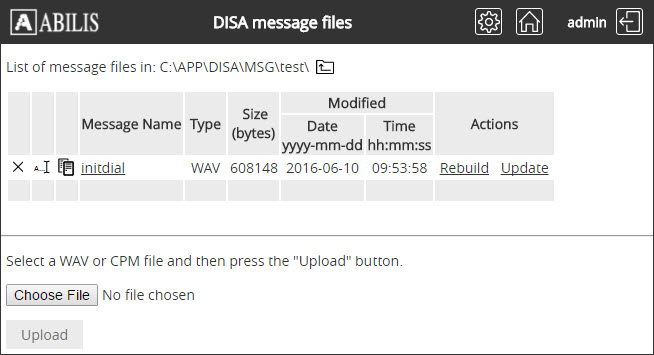
Click the message set name to add/change a message. Message files must be recorded on a PC and saved in WAV format.
![[Important]](../images/important.png) | Important |
|---|---|
Filenames are predefined for the event correlated to the message, please refer to: Section 53.8, “Message files”. |
Select the file to use and click Upload button.
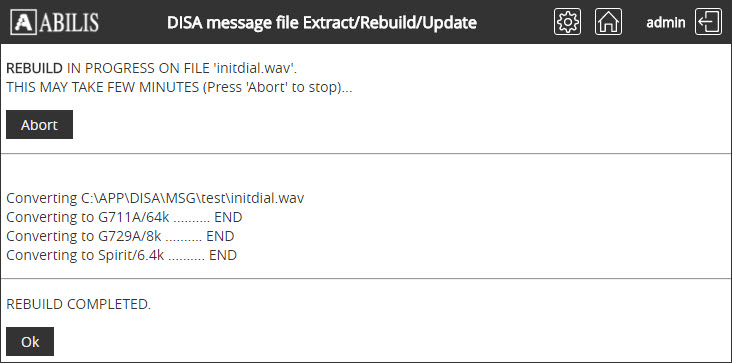
Click Yes on the confirmation page.

Click Ok button when the conversion is accomplished.
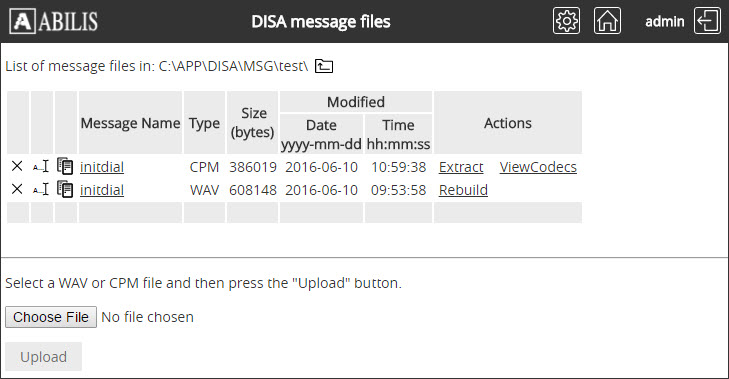
The CPM file is now present.
| Important |
|---|---|
Filenames are predefined for the event correlated to the message, please refer to: Section 53.8, “Message files”. |
To change the filename click the Rename button. Insert the new filename in the textbox and click the Ok button.
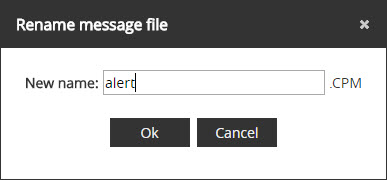
The filename was renamed.
| |  | |
| 63.15. Rio/Rvs configuration |  | 63.17. Voice Mail |