"In the Users management section you will be able to set many user specific parameters."
Navigate to Administration > Users Management.
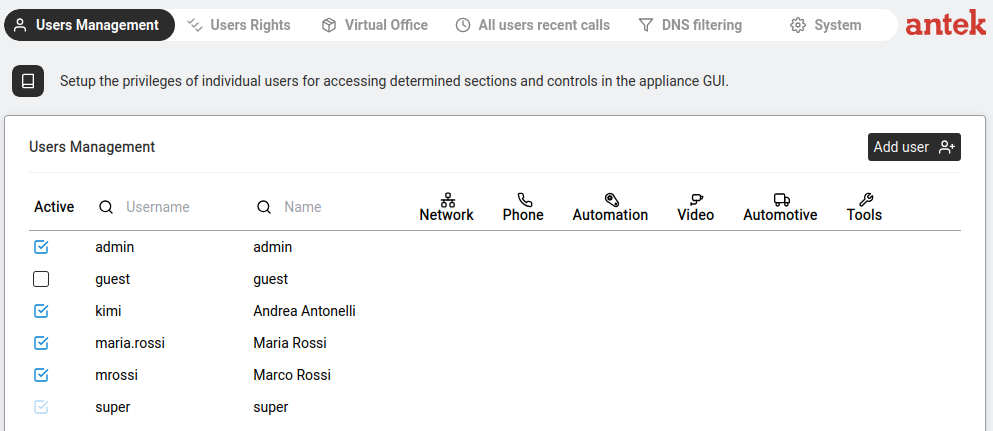
The main view shows a table of all user accounts:
| Column | What It Shows |
|---|---|
| Active | Checkbox — untick to disable the account without deleting it. |
| Username | The login name (e.g. admin, guest, super). |
| Name | Display name (can be different from username). |
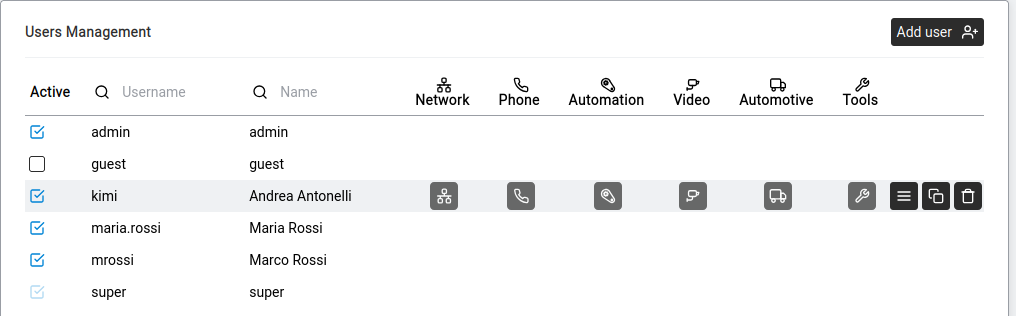
| Network / Phone / Automation / Video / Automotive / Tools | Privilege icons — filled = enabled, greyed = disabled. Shows at a glance what each user can access. |
Click Add user (top right) to create a new account. The dialog has two steps: first the username, then the password.
Once an account exists, hover over its row in the user list to reveal the Open details button.
| Username | Level | Purpose |
|---|---|---|
super | SUPER | Unrestricted access. Default password: PWDS + serial number. Change immediately. |
admin | ADMINISTRATOR | Full GUI access. Cannot be deleted. |
guest | USER | Restricted account — no access to Administration. |
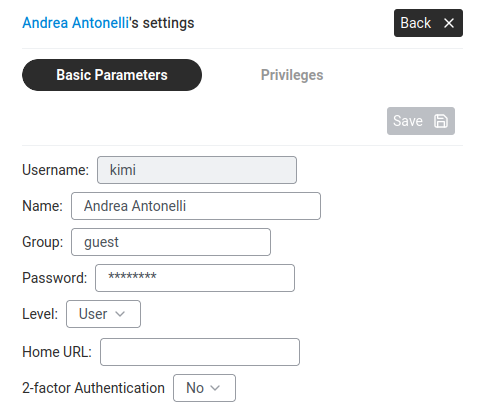
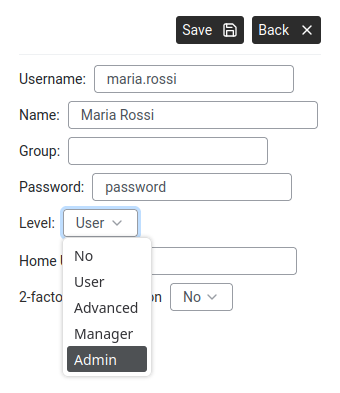
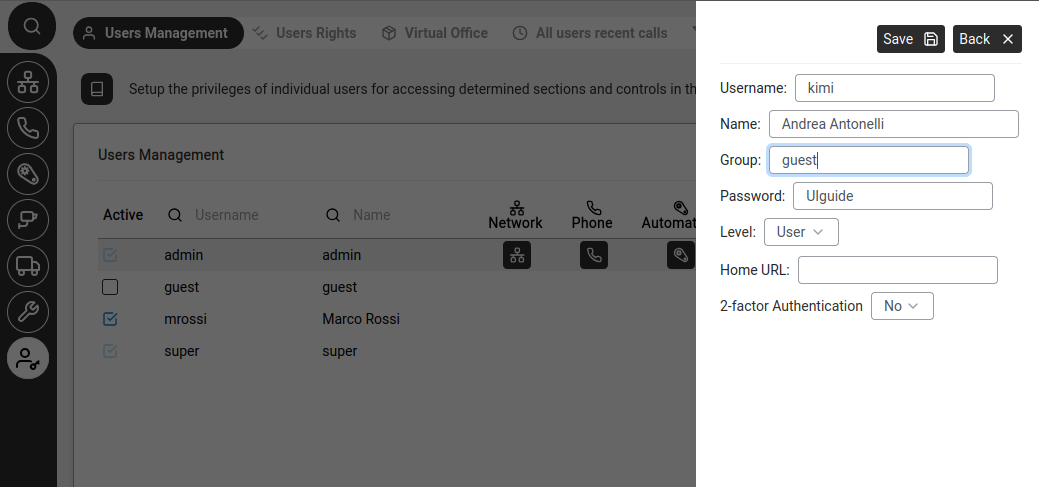
Click a user → Open details → Basic Parameters:
This parameter (introduced in version 9.0, replacing the old "HTTP" parameter) controls how much power a user has. The administrator assigns a level to each user:
| Level | What They Can Do | Typical User |
|---|---|---|
| NO | Cannot log into the Web Interface at all. | Accounts that only need FTP or phone access. |
| USER (BASIC in v9.0 reference manual) | Use the sections assigned via privileges. | Regular employees. |
| ADVANCED | USER + access to the Control Port (read-only diagnostic commands via Tools > Control Port). | Technically savvy users. |
| MANAGER | Can manage other users' settings (e.g. phone preferences). | Office managers, team leads. |
| ADMINISTRATOR | Full configuration access to all pages. | IT staff. |
| SUPER | Unrestricted. Reserved for super account only. | Primary system administrator. |
Click Privileges tab. Six sub-tabs control access to each sidebar section:
| Privilege Tab | What It Controls | Additional Options |
|---|---|---|
| Network | Access to Networking monitoring. | FTP Enabled checkbox. FTP home directory. |
| Phone | Access to Phone functions. | Sub-tabs: Settings (User's number, technology tabs: CTIP, CLUS, Abilisphone, SIP, Address Book, OPC panel, LDAP — each with "Enabled" checkbox), Phone Preferences, Recent Calls, Address Book. Assigned CTI port, telephone number, SIP number are set here. |
| Automation | Access to Automation. | Select which control panels the user can see. |
| Videorecorder | Access to Videorecorder. | Select which cameras the user can see. |
| Automotive | Access to fleet management. | — |
| Tools | Access to Tools. | — |
Click Save after each change. Back returns to the user list.