Step-by-step instructions for audio messages, disk management, CPU monitoring and data export.
The Tools section has tabs: Lists, Audio Messages, Alert Manager, SMS Gateway, Control Port, DISA, Disk Analyzer, CPU Load.
Goal: Record a new audio message using your computer's microphone — for use as a voicemail greeting, a DISA menu prompt or music on hold.
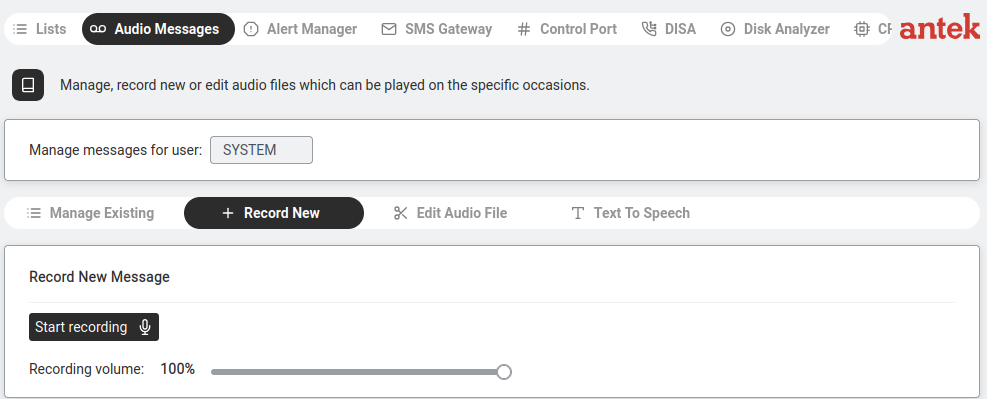
Audio Messages > Record New — Start recording button with volume slider.
Go to Tools > Audio Messages.
At the top, select Manage messages for user: SYSTEM (for system-wide messages like DISA greetings)
or a specific username (for personal voicemail).
Click the Record New tab.
Adjust the Recording volume slider if needed (default: 100%).
Click Start recording. Your browser will ask for microphone permission — allow it.
Speak your message. Click Stop when done.
A playback window appears so you can preview the take.
Enter a filename (e.g. DISAmsg_sales) and click Save. The file is now available in the Manage Existing tab and can be assigned to a DISA service, voicemail or music-on-hold slot.
Create an audio message using Text-to-Speech
Goal: Create an audio message by typing text and letting the Abilis convert it to speech — useful when you need a quick greeting without recording your own voice.
Text To Speech — type text, select a voice, play or download the audio.
Go to Tools > Audio Messages > Text To Speech tab.
Type your message in the text area (maximum 800 characters, counter shown at top).
Select a voice from the dropdown (e.g. en-GB-Wavenet-A for English British female).
Click Play to preview the audio.
Click Download audio to save the file, then assign it to a DISA service or voicemail
through the Manage Existing tab.
Upload an audio file from your computer
Goal: Upload an audio file (MP3 or WAV) from your computer to the Abilis — for example, a professionally recorded greeting or a music-on-hold track.
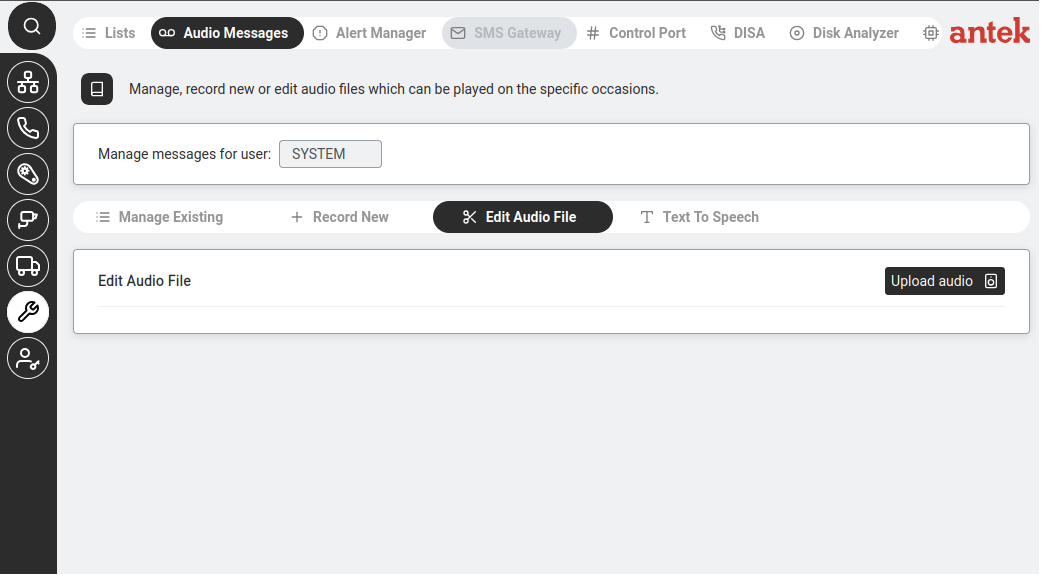
Edit Audio File tab with Upload audio button.
Go to Tools > Audio Messages > Edit Audio File tab.
Click Upload audio.
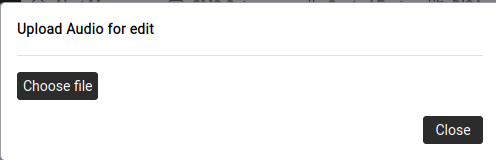
Upload Audio for edit — Choose file dialog.
Click Choose file and select an audio file from your computer.
Click Close when done. The file appears in the editor where you can trim or adjust it.
Edit or trim an audio file
Goal: You have an audio message that is almost right but needs a small
adjustment — trim a few seconds of silence from the start of a voicemail greeting, cut
off a throat-clearing at the end of a DISA announcement or shorten a piece of music-on-hold
that is slightly too long. The Abilis has a built-in editor so you don't need Audacity
or any external tool.
Tools > Audio Messages > edit view. Trim, cut or adjust audio messages used by the auto-attendant, voicemail greetings and music-on-hold.
Go to Tools > Audio Messages and switch to the
Edit Audio File tab.
Load the file to edit. You have three options:
Click Upload audio to pick a file from your computer (if it's
not already on the Abilis).
Click Load from CF to open a file already stored on the unit.
Or select an existing file from the Manage Existing list — it opens
in the editor for modification.
The audio waveform appears in the editor. Drag across it to select a region, then use
the toolbar:
Play / Pause — listen to the whole track.
Play selection — listen to just the selected region.
Cut selection — remove the selected region; the rest joins together.
Decrease / Amplify — lower or raise the volume of the selection.
Undo — step back through recent edits.
Preview the result with Play. If it sounds right, click
Save. Otherwise Undo and adjust the selection.
The edited file replaces the one in the audio library — every DISA service,
voicemail or MIX that references it now uses the updated version immediately.
If an edit goes wrong, download the original first as a backup (from the
Manage Existing list, the download icon). That way you can restore the original if the
trimmed version is unusable.
The editor handles small adjustments well — trims, cuts, volume levelling.
For heavier work (multi-track mixing, denoising, fading) it is easier to edit the file in
a desktop tool like Audacity and then re-upload it via
Upload an audio file.
Check disk usage and clean up space
Goal: Check how much disk space the Abilis is using and what is consuming it — recordings, logs, audio files — and confirm the disk is healthy.
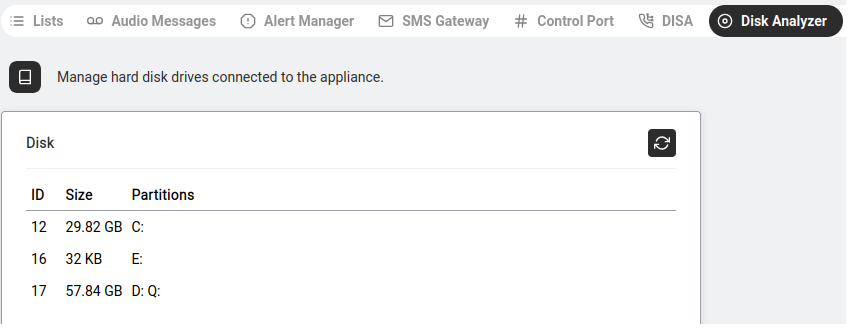
Disk Analyzer — list of all disks with ID, Size and Partitions.
Go to Tools > Disk Analyzer.
The table shows all connected disks: ID, Size and Partitions (drive letters like C:, D:, E:).
Click on a disk to see details.
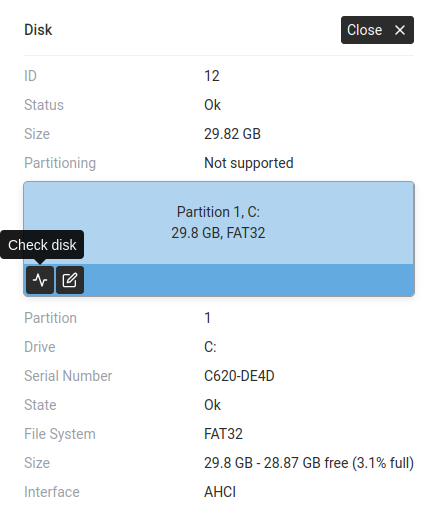
Disk detail — Status, Size, File System, free space percentage, Serial Number, Interface.
The detail view shows:
Status: Ok or error state.
Partitioning: supported or not.
A visual map of partitions (blue blocks).
Per partition: Drive letter, Serial Number, State,
File System (FAT32, NTFS…), Size with free space and percentage,
Interface (AHCI, USB…).
Click Check disk to run a health check on the selected partition.
Free up disk space when the Abilis is getting full
Goal: You've checked disk usage and one of the
partitions is near full. You want to free space — safely, without deleting anything
critical — so the Abilis keeps running normally and has room for new recordings, logs,
and firmware upgrades.
What usually fills the disk, in order of how much space each can take:
Video recordings from cameras — by far the biggest space consumer on units with
videorecorder.
Old firmware versions kept on disk after upgrades.
Call recordings.
Old audio-message versions and unused greetings.
Logs, configuration backups and crash dumps.
Recordings first. On units with cameras, open
Videorecorder and review the Storage and
Recording max age settings per camera. Lowering the max age from 30 days to
14 days typically recovers most of the space — see
Manage recording storage. Old recordings are
deleted automatically the next time the retention job runs.
Old firmware versions. Go to
Boot Management. If several older firmware
versions are listed under Select next boot version, keep the current one and
the most recent previous one as a rollback safety net, and delete the rest. Each
version saved is typically 50–150 MB.
Call recordings. Go to Phone > Recent Calls.
Calls with recordings attached have a player icon. Export any you need to keep, then
delete the rest. For bulk cleanup of old recordings, filter by date range first.
Unused audio messages. In
Tools > Audio Messages > Manage Existing, review the list
and delete old greetings that are no longer referenced by any DISA service or
voicemail. Be cautious — deleting a greeting that is in use will break the
corresponding DISA route until you replace it.
After each round of deletion, go back to
Tools > Disk Analyzer, click the partition and confirm
the free-space percentage has improved.
Never delete files directly via FTP or SSH from the Abilis filesystem
unless you know exactly what they are. Removing system files, the running firmware or
the active configuration can brick the unit — the web interface exists precisely so you
don't have to guess. If the web interface offers no way to remove a particular file, leave
it alone and ask Anteklab.
If space is a recurring problem, the long-term fix is usually one of:
(a) a larger storage drive — the Abilis supports drive replacement, (b) shorter camera
retention or (c) offloading recordings to a NAS. The Videorecorder max age
setting alone handles most installations without any hardware change.
Monitor CPU load
Goal: Check whether the Abilis processor is under stress — and if it is, find out
whether it's a temporary spike or an ongoing problem that needs attention.
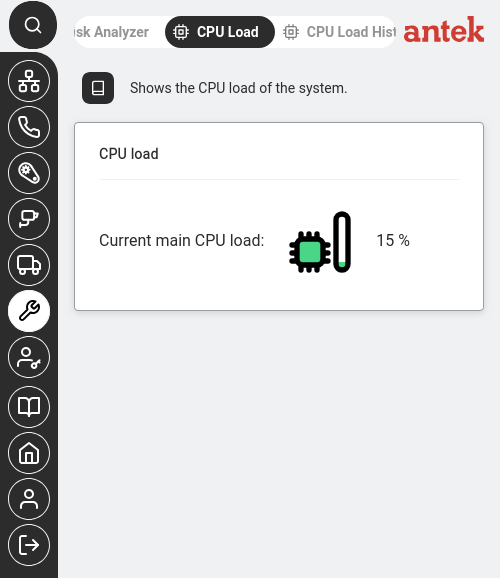
CPU Load — current main CPU load at 15%. The green bar fills proportionally.
Go to Tools → CPU Load. The page shows the current processor load as a percentage with a visual bar indicator. A quick glance tells you if the system is idle (0–10%), working normally (10–30%) or under heavy load (above 50%).
Check the CPU Load History tab (next to CPU Load at the top). This shows a graph of CPU usage over time — useful for spotting patterns like "CPU spikes every day at 9am when everyone arrives" or "CPU has been climbing steadily over the past week."
Note: If the History tab shows "Variable with not logged OID in request" instead of a graph, SNMP logging for the CPU metric hasn't been configured. The real-time CPU Load tab still works — History just needs SNMP polling to be active to record data over time. If you need historical CPU trends, SNMP logging for the CPU metric must be enabled — this is a unit-wide setting; contact Anteklab to turn it on.
Interpret what you see:
Load
What it means
0–30%
Normal. The Abilis is comfortable.
30–70%
Moderate. Busy but has headroom. Watch it during peak hours.
Above 70%
Heavy. The web interface may respond slowly. Check what's causing it — many simultaneous phone calls (especially with transcoding), HD camera recording, heavy VPN traffic or an automation script running at high frequency.
Above 90% sustained
Overloaded. Calls may drop, cameras may stutter. Reduce active services or contact Anteklab support.
Export logs and call data
Goal: Download call logs, system logs or traffic data from the Abilis to your computer —
for reporting, auditing or sending to support when diagnosing a problem.
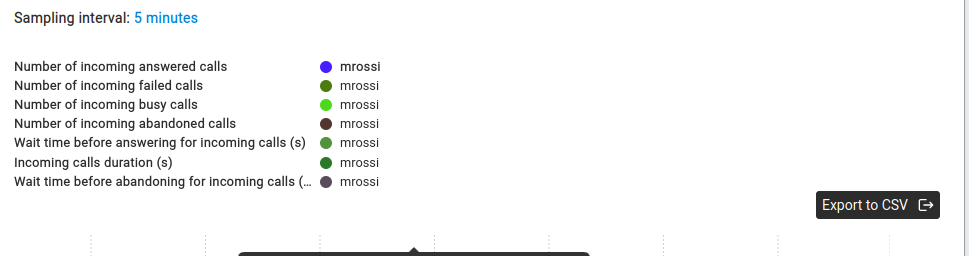
Statistics graph with Export to CSV button — call metrics for a user.
Decide what you need to export. The Abilis stores several types of data, and each is exported
from a different page:
What you need
Where to find it
What you get
Call history (who called whom, when, duration)
Phone → Statistics
CSV with answered, failed, busy, abandoned calls per extension
Navigate to the relevant page from the table above.
Generate the report or graph you want to export (select the time range, the user or connection, etc.).
Click "Export to CSV". The button appears once the data is displayed. Your browser will download
a .csv file that you can open in Excel, Google Sheets or any spreadsheet application.
Tip: When sending data to Anteklab support to help diagnose a problem,
export the relevant data covering the time period when the issue occurred and attach the CSV file
to your email. This is much more useful than a screenshot because support can filter and analyse the raw data.
Goal: You need to send the same SMS — or personalised variants — to many
recipients at once. Customer appointment reminders, a delivery notification to a
distribution list, a service-outage warning, invitations for an event. Typing each one
in the web form would take hours; uploading a CSV takes one minute.
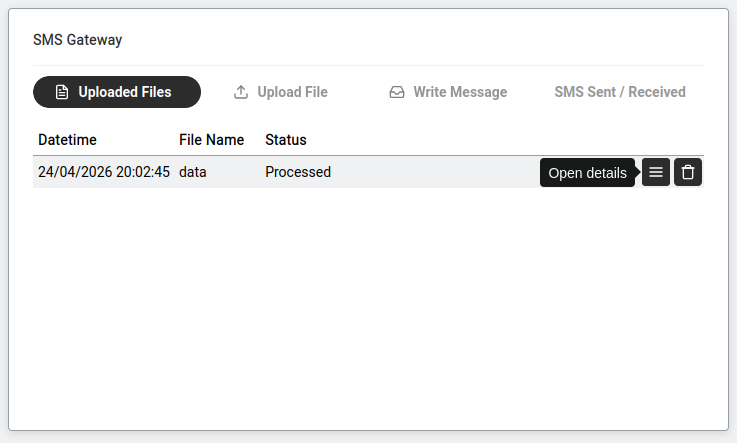
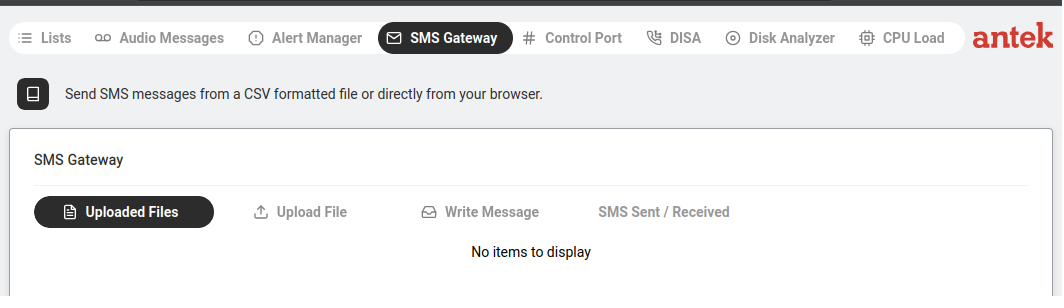
Tools > SMS Gateway > Uploaded Files. After uploading a CSV file with phone numbers and messages, the status shows "Processed" once sending is complete.
CSV (Comma-Separated Values) — a plain text file where
each line is one record and fields are separated by commas. Spreadsheet programs open
and save CSV natively. The Abilis SMS Gateway expects a simple format: one row per
recipient, with columns for the phone number and the message text.
Prepare the CSV file on your computer. A minimal layout:
+393481234567,Hello Mario — your order is ready for pickup.
+393482345678,Hello Giulia — your order is ready for pickup.
+393483456789,Hello Paolo — your order is ready for pickup.
Numbers must be in international format with leading + and country
code. The text is everything after the first comma on each line; commas inside the
text need to be quoted according to standard CSV rules.
Go to Tools > SMS Gateway and open the
Upload File tab.
Click Choose file, pick your CSV and click Upload.
The file appears in the list with a record count (so you can verify it parsed
correctly — the count should match your row count).
Click the uploaded file to review the recipients. Spot-check a few rows before
sending.
Click Send. The Abilis starts dispatching through the SIM modem,
typically one message per second or two.
Monitor delivery on the SMS Sent / Received tab — each message
shows as Sent, Delivered or Failed. Failures are usually bad numbers or a modem
reset; the rest go through.
Sending rate is limited by the SIM modem, not the Abilis — most SIMs
send 1–2 SMS per second. A list of 500 recipients takes 5–10 minutes to fully dispatch.
Plan timing accordingly for time-critical notifications.
Bulk SMS is subject to operator anti-spam policies. Very large blasts
(thousands of messages) from a consumer SIM can trip anti-abuse systems and temporarily
block the SIM. For regular high-volume sending, use a business SIM designed for machine
traffic.
View, search and manage received SMS
Goal: The Abilis SIM receives SMS — 2FA codes sent to a company number,
customer replies, delivery confirmations from carriers, alerts from other systems. You
want to see the inbox, search the history and clean up old messages.
Tools > SMS Gateway. Use the tabs to upload CSV files for bulk sending, compose individual messages or view the sent/received log.
Go to Tools > SMS Gateway and open the
SMS Sent / Received tab.
The list shows every SMS, most recent first, with columns:
Direction: incoming or outgoing.
Date / Time: when the Abilis handled the message.
Number: sender (for incoming) or recipient (for outgoing).
Status: Delivered, Sent, Received or Failed.
Text: the message contents, truncated.
Filter the list:
Direction dropdown — narrow to only incoming, only outgoing
or only failed.
Search box — type a phrase to find messages containing that
text, or a number to find messages to/from that recipient.
Date range — restrict the view to a specific period.
Click a row to see the full message text if it was truncated in the list.
Tidy up when the list gets long. Tick the checkboxes next to messages no longer
needed and click Delete. SMS records don't take much disk space
but a cleaner list is easier to search.
Export the history for audit or reporting: click Export to CSV
with the filter still applied — you get exactly what is currently visible.
If you rely on the Abilis SIM to receive 2FA codes for shared business
accounts (bank, ERP, portals), consider setting up forwarding so the code is sent to
staff on duty automatically — a common pattern is an SMS-to-email bridge where incoming
messages trigger an email to a distribution list. This requires a small piece of custom
logic; ask Anteklab if you want it deployed.
Forward incoming SMS to email or another mobile
Goal: The Abilis SIM receives an SMS — a two-factor authentication
code for a bank or ERP system, a delivery alert from a carrier, a reply from a
customer — and the message needs to reach a person or a team, not sit
unread in the Abilis inbox. You want every incoming SMS (or ones matching specific
patterns) to be relayed immediately to email, to another mobile or to both.
Common uses: shared-account 2FA codes going to the staff currently on duty; delivery
alerts going to a dispatch distribution list; customer replies going to the sales
desk.
Go to Tools > SMS Gateway and open the
Forwarding Rules tab.
Click New + and configure the rule:
Match: what triggers this rule. Options:
Any SMS — every incoming message is forwarded (simplest case).
From specific number — e.g. only messages from the bank's SMS
gateway.
Containing text — e.g. messages containing the word
code (useful to catch 2FA without catching marketing SMS).
Action — Forward to email: one or more addresses, separated
by commas. A distribution list works well for team forwarding. The email
subject includes the sender's number; the body contains the full SMS text.
Action — Forward to mobile: one or more destination numbers
in international format. Each gets a copy as a new SMS.
Delete after forwarding: optional. Keeps the inbox clean but
loses the Abilis-side audit trail. Recommended off unless you have
external logging.
Save. The rule is active immediately for the next incoming SMS.
Test. Send a test SMS to the Abilis SIM from a phone that matches the rule.
Confirm the email or SMS arrives at the destination within seconds. Check the
spam folder on the first email test.
For 2FA code forwarding specifically, combine a Match — From
specific number rule (only the bank's sender ID) with Forward to email
pointing at the on-duty distribution list. Codes arrive at the right people; marketing
SMS to the same SIM doesn't spam the list.
Forwarded 2FA codes reduce security if they're delivered to
insecure channels. Email is fine if the account has 2FA and strong password itself;
forwarding to another mobile (a personal one) exposes codes outside company control.
For high-security accounts, prefer direct integration with an authenticator app over
SMS-based 2FA altogether.
Outbound forwarding (email or SMS) consumes SIM credit or SMTP quota
respectively. On a busy line, check cost implications before enabling a forward
every message rule — a spam SMS burst gets forwarded one-for-one to all
destinations.
Anteklab Technical Support
Email: tem@antek.it
Tel: +39 0376 16262,27